Recipe: Superman Cake

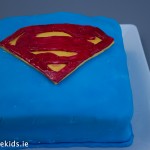
My little Superman turned 4 recently and of course he wanted a Superman cake. I wasn’t quite sure how this would work out but I was delighted with the results.
I used a basic sponge recipe and coloured one layer blue and one layer red.

I took the lazy option and used Betty Crocker’s Vanilla Icing. This carries a May Contain Milk warning so make your own if you are worried. To make your own buttercream icing here is the recipe. I also used white ready to roll fondant icing and dyed it the colours I needed.
Creating the Logo
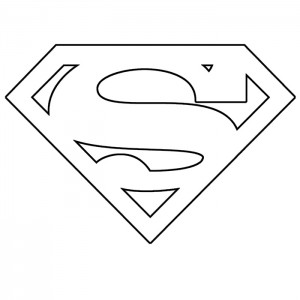
I downloaded a Superman logo template and printed out on an A4 page.

I followed this video on Youtube for how to make the logo (ignore shaping of cake unless you want the half diamond shape).
Mine didn’t turn out as clean as this one but I was happy with the results all the same and my little all grown up Superman was very excited.
Roll out the yellow icing. Place on baking paper. Place your paper pattern on top and use a sharp knife or palette knife to cut around it. Place it in the freezer for half an hour.
Roll out white icing on baking paper. Place your pattern on top and using a cocktail stick, mark around the lines of the S. Using a sharp knife cut out the spaces around the S. Place it in the freezer also for 30 minutes.
Remove from freezer and using a small paint brush and red food dye, paint the S, ensuring to cover all the white bits.
Place on top of the yellow icing.
Paint the top of the cake with a little water and stick on the logo.

Superman Cake
Ingredients
- 225 g self raising flour
- 125 g margarine
- 275 g caster sugar
- 2 eggs
- 160 ml water
- [I doubled this amount to make a taller square cake but this amount enough for about 15 little ones]
Instructions
For the Sponge
-
Grease and line a deep square baking tin or two shallow ones.
-
Preheat oven to 180C / 170C Fan / 350F / Gas 4
-
Sieve flour into a bowl, add the rest of the ingredients and beat together in an electric mixer or hand mixer until smooth.
-
Spread out in baking tin.
-
Bake for 30-40 minutes until a skewer comes out clean.
-
Stand for 5 minutes before turning onto a wire rack to cool.
For the icing
-
I took the lazy option and used Betty Crocker's May Contain Milk Vanilla Icing and white ready to roll fondant icing. Link to buttercream icing recipe and homemade fondant above.
-
Place the cake on a plate and cover with the butter icing. Use a palette knife or spatula to smooth it out but don't be too particular as you are covering anyway.
-
I used a 1 KG pack of white ready to roll icing.
-
Halve the icing and then split into quarters.
-
Leave one quarter white for the moment.
-
Dye one quarter yellow, using yellow gel food colouring. Put a small amount onto the icing and knead until the colour is uniform throughout. Add more until you reach a bright yellow colour.
-
Roll out the yellow icing.
-
Place on grease proof paper.
-
Place your Superman logo on top and use a sharp knife or palette knife to cut around it.
-
Lift it with the paper and place flat in the freezer.
-
Do the same with the white icing.Place your paper logo on top and using a cocktail stick, mark around the lines of the S. Using a sharp knife cut out the spaces around the S.
-
Place it in the freezer also for a few minutes.
-
Dye the remainder of the icing blue using blue gel food colouring, same method as yellow above.
-
Roll out to large enough to fit over the cake.
-
Drape over the cake and trim away the edges.
-
Remove the white icing from freezer and using a small paint brush and red food dye, paint the S, ensuring to cover all the white bits.
-
Place on top of the yellow icing.
-
Paint the top of the cake with a little water and stick on the S symbol.
-
Give to one happy 4 year old and sing Happy Birthday!


What a fabulous Superman cake! Your son clearly loved it. I like how you used two colours for the sponge and great idea to use the logo to help with the decorating. #FreeFromFridays
Thanks Sara :)
Happy birthday little Superman! This looks great. I really need to work on my cake decorating skills. #freefromfridays